

Let's clear some of the terminologies first...
Dockerfile
Dockerfile is a simple text file that consists of instructions to build Docker images.
Docker Image
A Docker Image is a read-only file with a bunch of instructions. When these instructions are executed, it creates a Docker container.
Containers
Containers are packages of software that contain all of the necessary elements to run in any environment.
Why do we need to build a Dockerfile?
So a Dockerfile is used to automate the installation and configuration of a Docker image. Dockerfiles make it easy to deploy multiple Docker containers without having to maintain the same image across multiple virtual machines.
Let's do some hands-on...
Basically, we are going through a whole process, which includes :
Make a Dockerfile for your existing project
Build the Dockerfile and run it on your system to access the application on the browser.
Push the Docker Image to Docker Hub.
STEP-1
For this hands-on, I am going to make the Dockerfile for my existing open-source (Node) project.
You can check out the project here: https://github.com/Kanika637/amazon-clone
For making the Dockerfile, there is a certain syntax which we can follow.
Create a file naming "Dockerfile" in the project.
- First comes the base image, which in this case node:12-alpine

FROM creates a layer from the node:12-alpine
- Next, specify the working directory of the Docker container which includes all the necessary files.

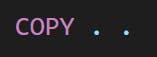
Now, the COPY instruction lets us copy a file (or files) from the host system into the image.
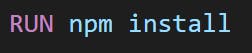
Next, specify the command which is necessary for the project to install all the packages, which in this case is
npm install
- CMD command specifies the instruction that is to be executed when a Docker container starts. And for a node project, it is
npm start

STEP-2
The next step is to build the Dockerfile, and the command to do that is:
docker build -t amazon-clone .
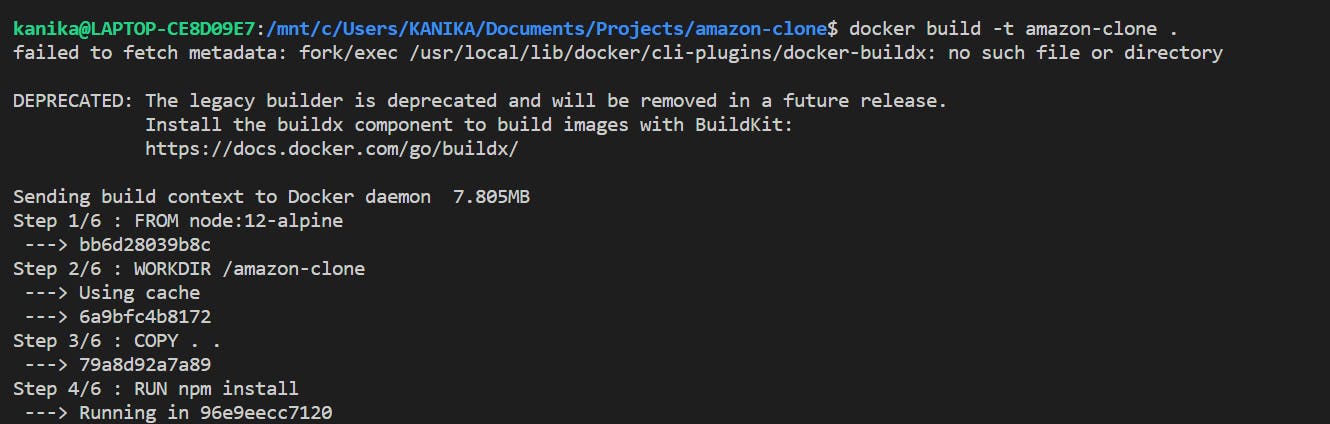
The name for our image in this case is amazon-clone
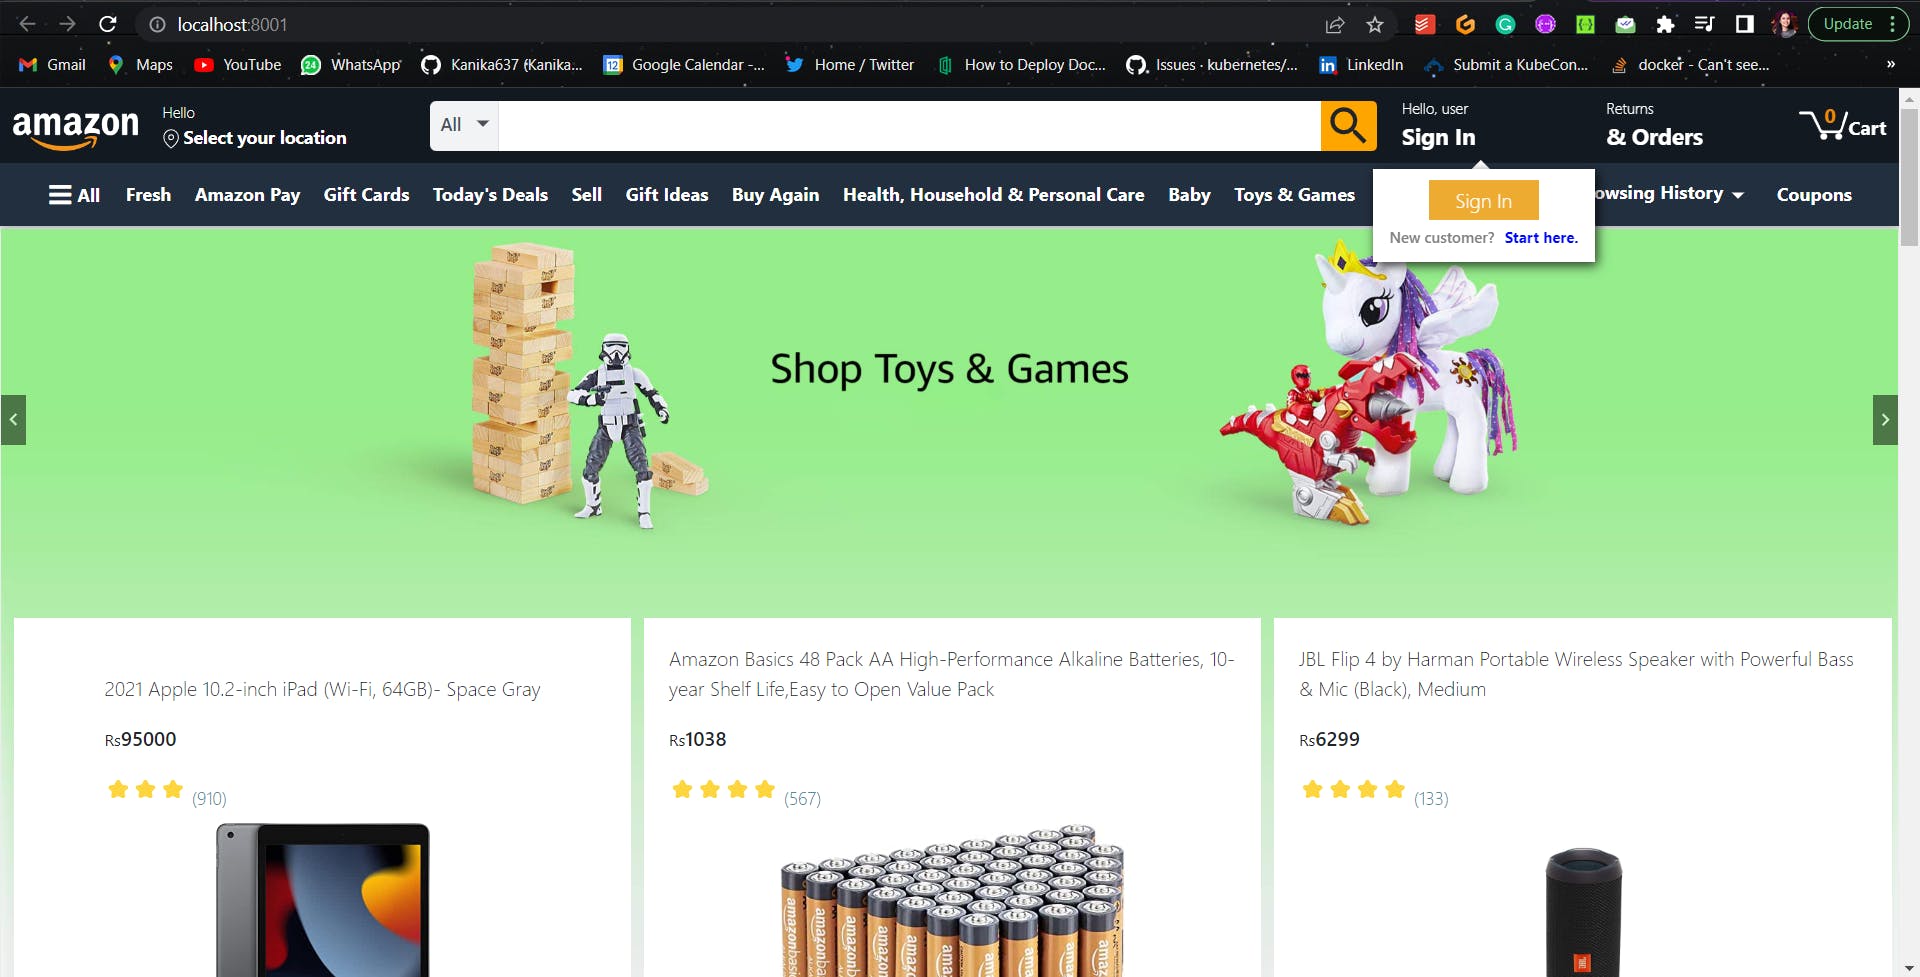
Great! Now since the build was successful, let's run the image as a container by exposing it to a specific port.
docker run -p 8001:3000 amazon-clone:latest
Here, the tag for this image is the latest which is a default tag (-p is short for -publish).
Remember this
docker run -p <hostName>:<containerPort> imageName, as playing with ports could be a little overwhelming.For understanding "How To Expose Ports", make reference to this article https://www.mend.io/free-developer-tools/blog/docker-expose-port/
And here we can see our application running on the browser.
STEP-3
Congratulations, you have successfully built the Dockerfile and it's running on your local system.
Now it's time that someone else could use your image, and run it in their system as well.
For this, we will now push our image to Docker Hub.
Open Docker Hub, make your account and sign in.
For making a repository, click on Create repository
Give a specific name for your repository and set the accessibility as private or public as per your choice. Preferably make it public.
Before tagging and pushing the image, there are some parameters which are important to understand
In these commands:
amazon-clone -> Name of the Image
kanika26 -> Username for your Docker Hub account
my-images -> Name of the repository
myfirstpush -> Tag for your image
- After building the image, the command for tagging the image is
docker tag amazon-clone:latest kanika26/my-images:myfirstpush
- For pushing the image to Docker Hub, follow this command
docker push kanika26/my-images:myfirstpush

This is how your Docker Hub account will look now
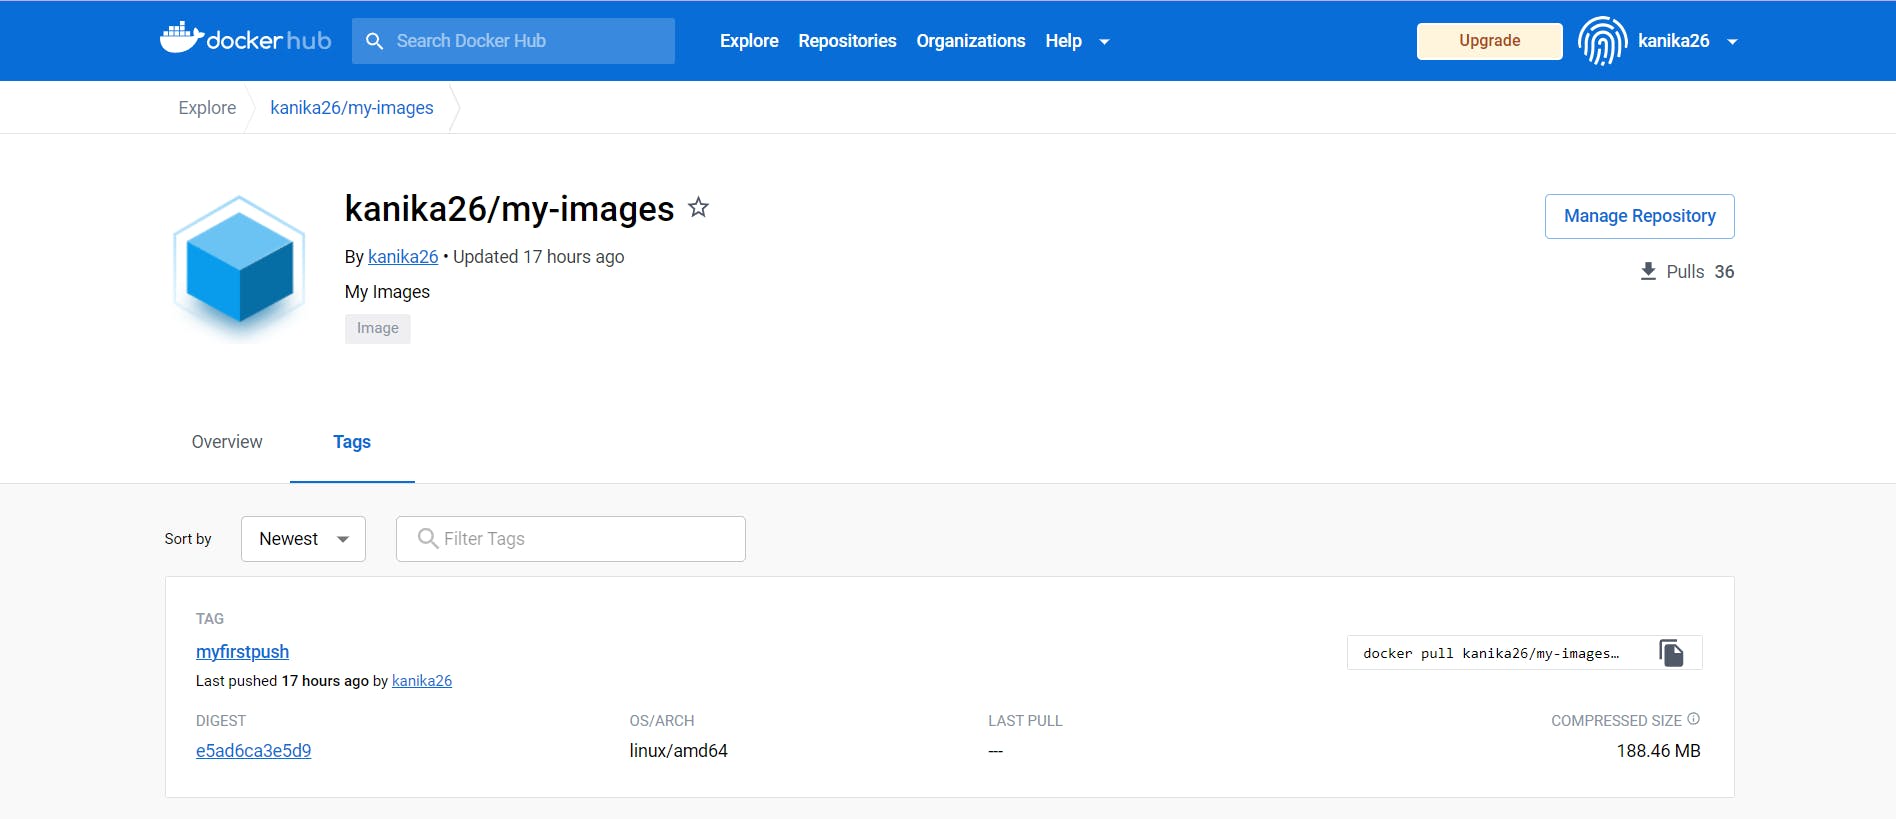
And that's it, now your Docker Image is public and anyone can use your image with the command docker pull kanika26/my-images:myfirstpush